Workshop DIY
The Gnarliest Bearing Swap
The first set of bearings turned out to be the nastiest to pull. This was in part because it was a pair of bearings pressed in together, with only partial access to press them out from behind, and no access to the outer race at all. The other reason they were so bad was because I hadn't figured things out by screwing them up yet.
I didn't consider using a blind drift, because I didn't think I could get purchase on the gap between the bearings because they were pressed together so tightly, and I didn't have the right size drift anyway.
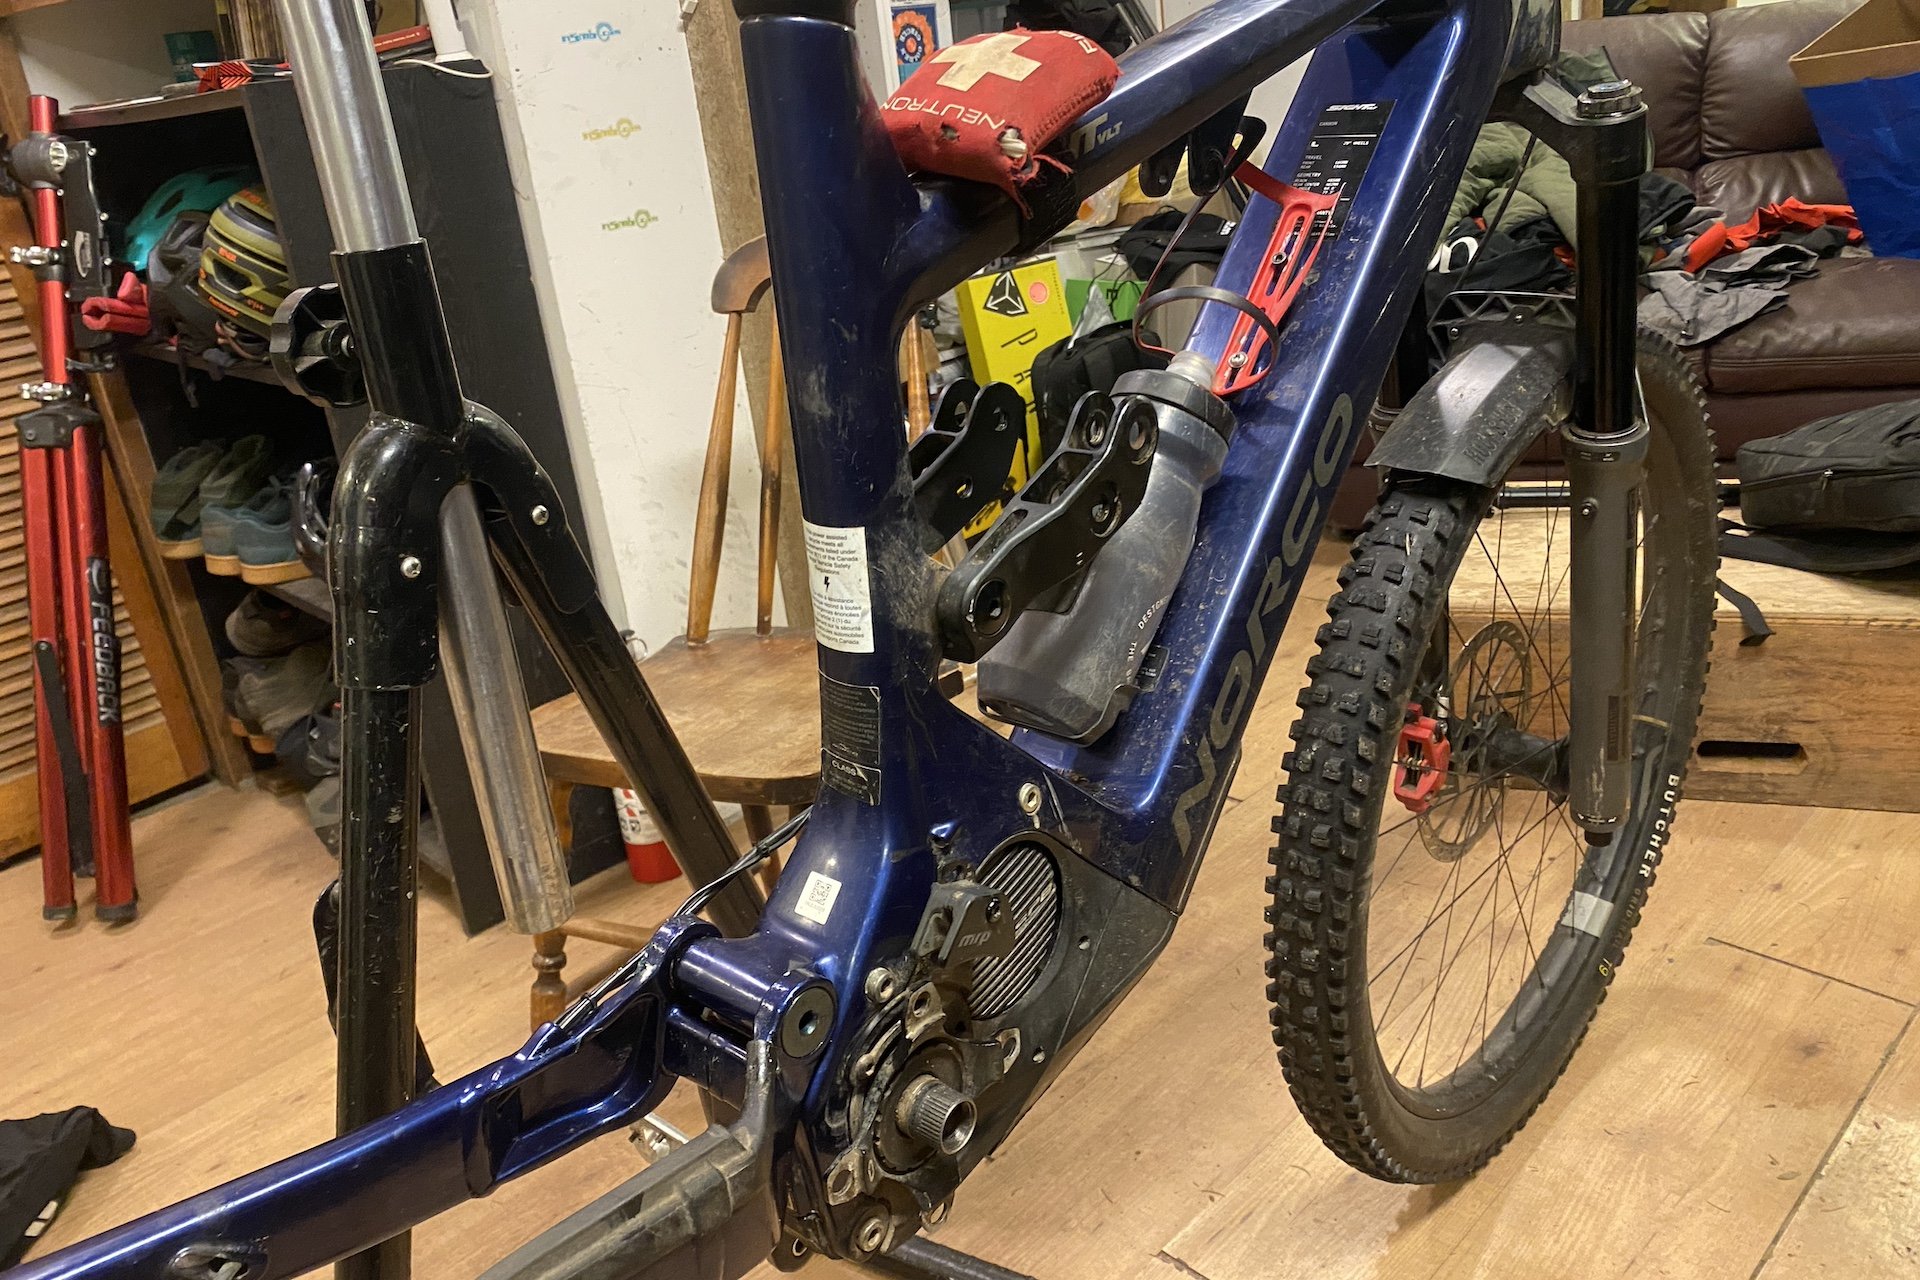
That wasn't hyperbole. My 2022 Norco Sight VLT has 18 pivot bearings. There are a total of 8 pivots and 7 of them are equipped with 2 bearings apiece while one has 4. There are 16 of one size (6902 etc.) Enduro Max bearings and two slightly larger ones (6901 etc.)
Eventually I went old school and smashed the remaining bearing from behind with a hammer. Before that I had bodged together a few different parts from different bearing pullers and pulled on the two bearings together. The outside bearing popped but the remaining bearing had angled itself. Okay, actually I managed to pull it at a less than optimal angle and it had jammed itself inside its aluminum-lined hole in the carbon fibre seat stay. This was not ideal.
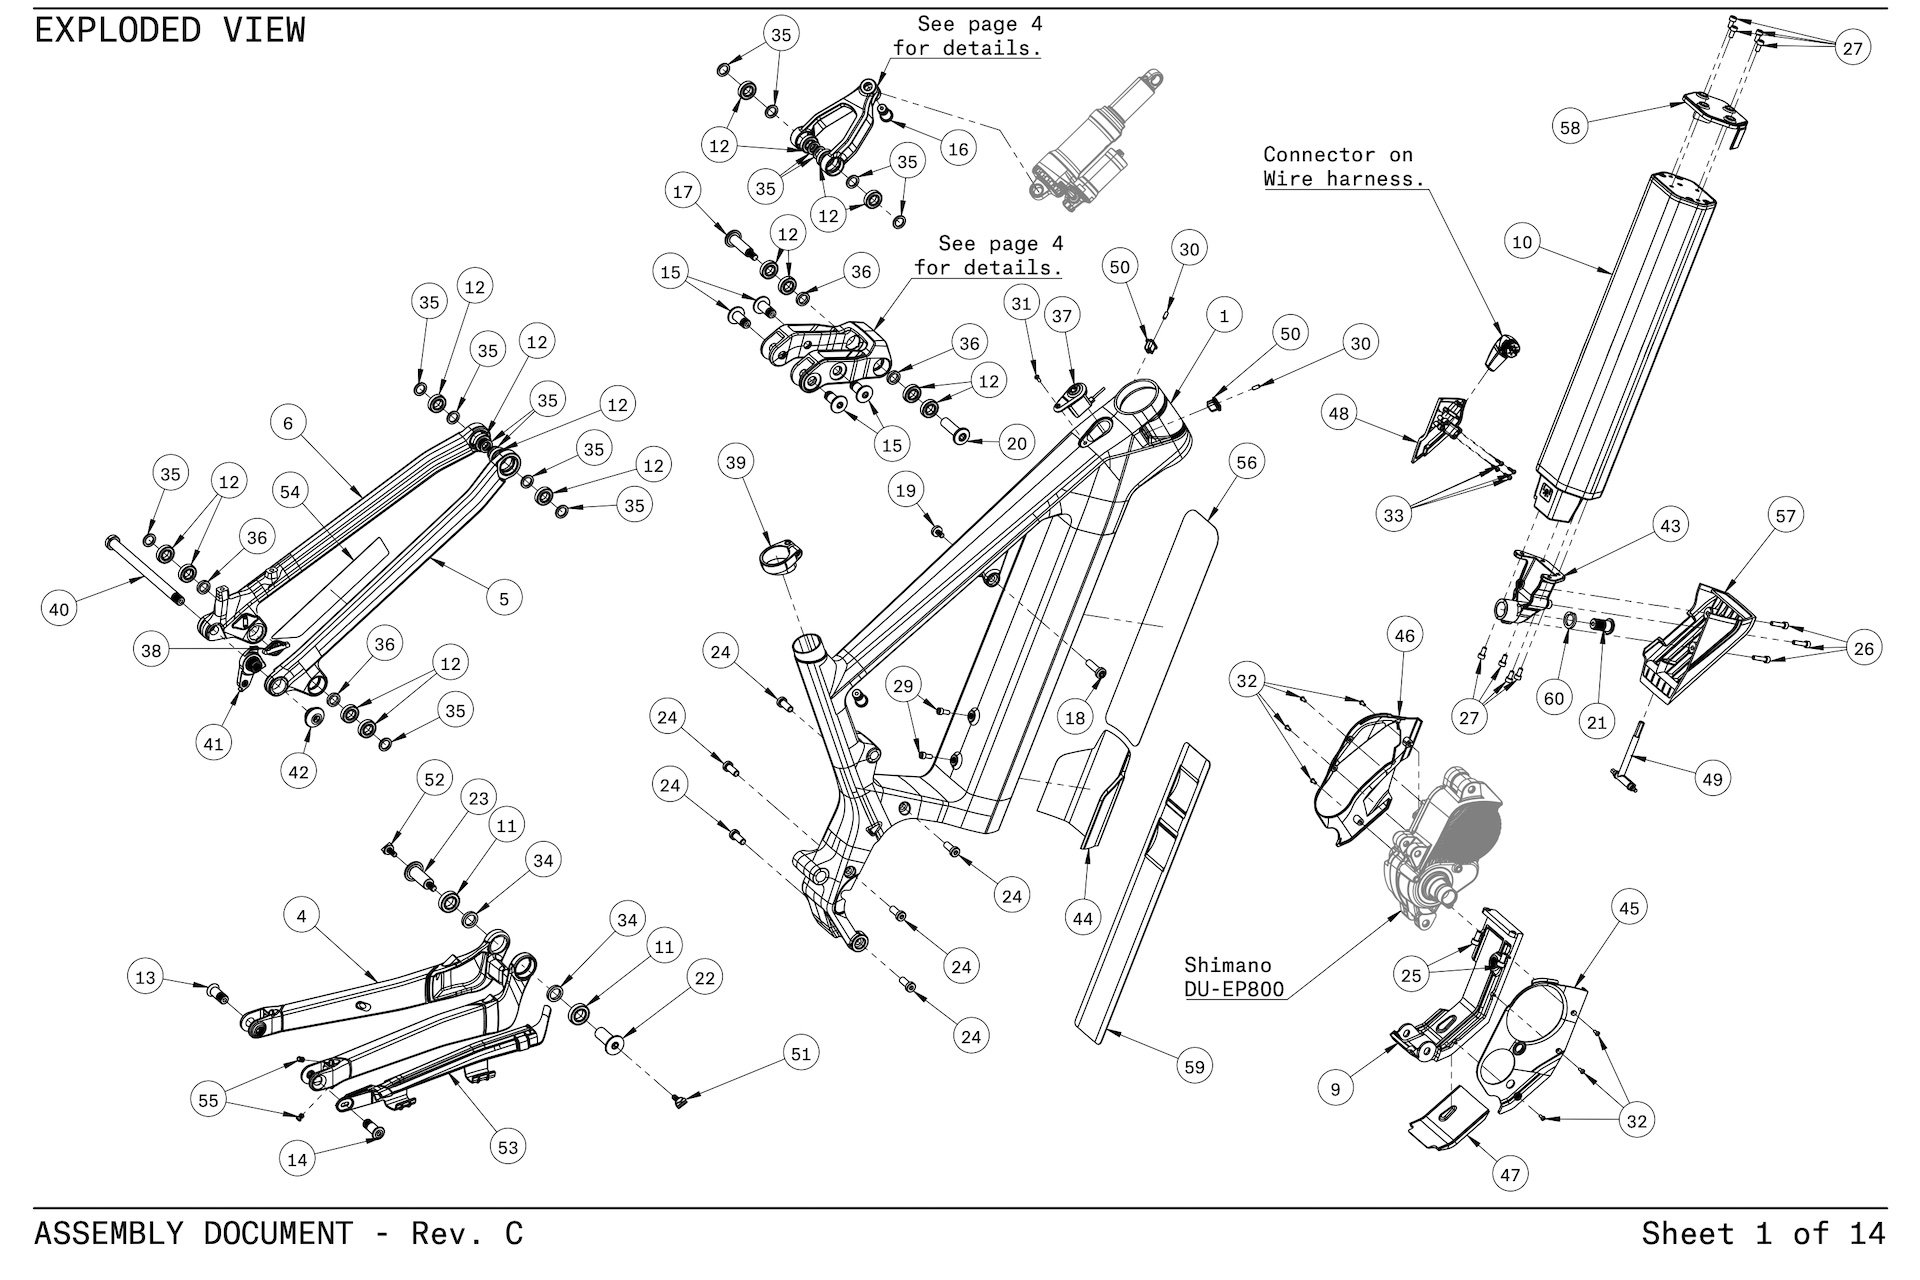
Feel free to count them. Norco's parts support and documentation is really good. A how to video for the bearings would be nice though. And having both Norco Sight VLT diagrams labelled would have saved me some heartache.
More bashing ensued until the inside bearing bits were spat out and only the outer bearing race, still wedged at a nauseating angle, remained. I knew I had to be careful here, because destroying the aluminum bearing seat would trash the entire seat stay. Some hammer and chisel work got part of the steel race out but another chunk remained wedged. I was quite sure I was fucked at this point but I pressed on and, to my amazement, got the rest out.
This whole process, only to remove two bearings, took several hours. I didn't have the perfect tools and there was no guide to work from, but that was kind of the point. I wanted to figure it out on my own. But I was spent and it would be two and a half months before I was ready to tackle the rest of the task.
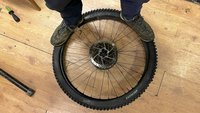
Twelve bearings keep these rocking smoothly.
Why was I putting myself through this? I'd had some annoying and difficult to diagnose play in the rear end of my Norco Sight VLT. I couldn't notice it when I was riding, although it still may have been working against me, but when I grabbed a handful of frame and yanked the wheel side to side, it was incredibly obvious. Swapping all the bearings seemed like a good place to start, but I had no idea how many there would be. I was also surprised to learn about this particular parallel pair that didn't allow access to the outer bearing race from behind. No matter, the next set would have to be easier.
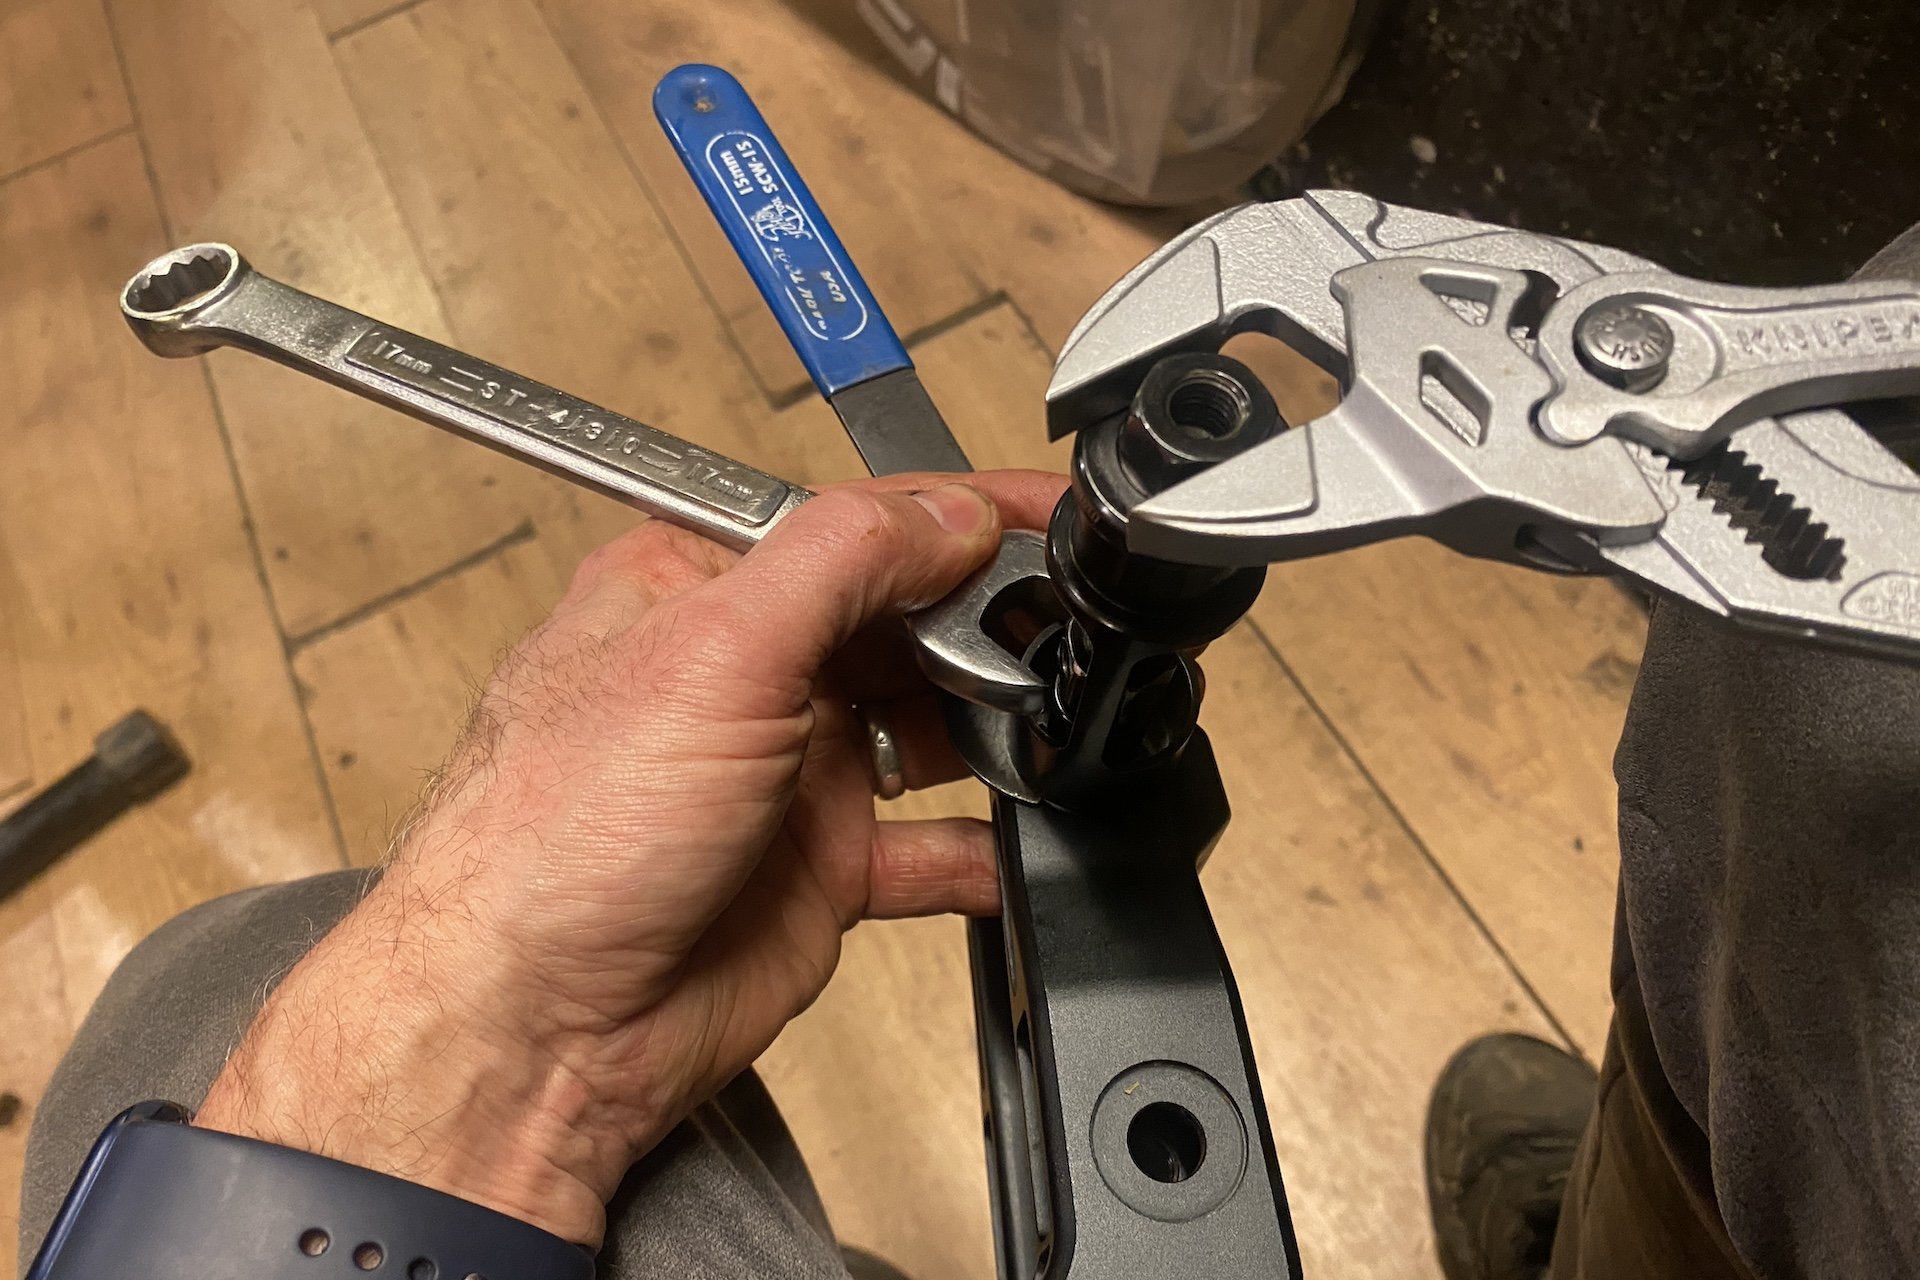
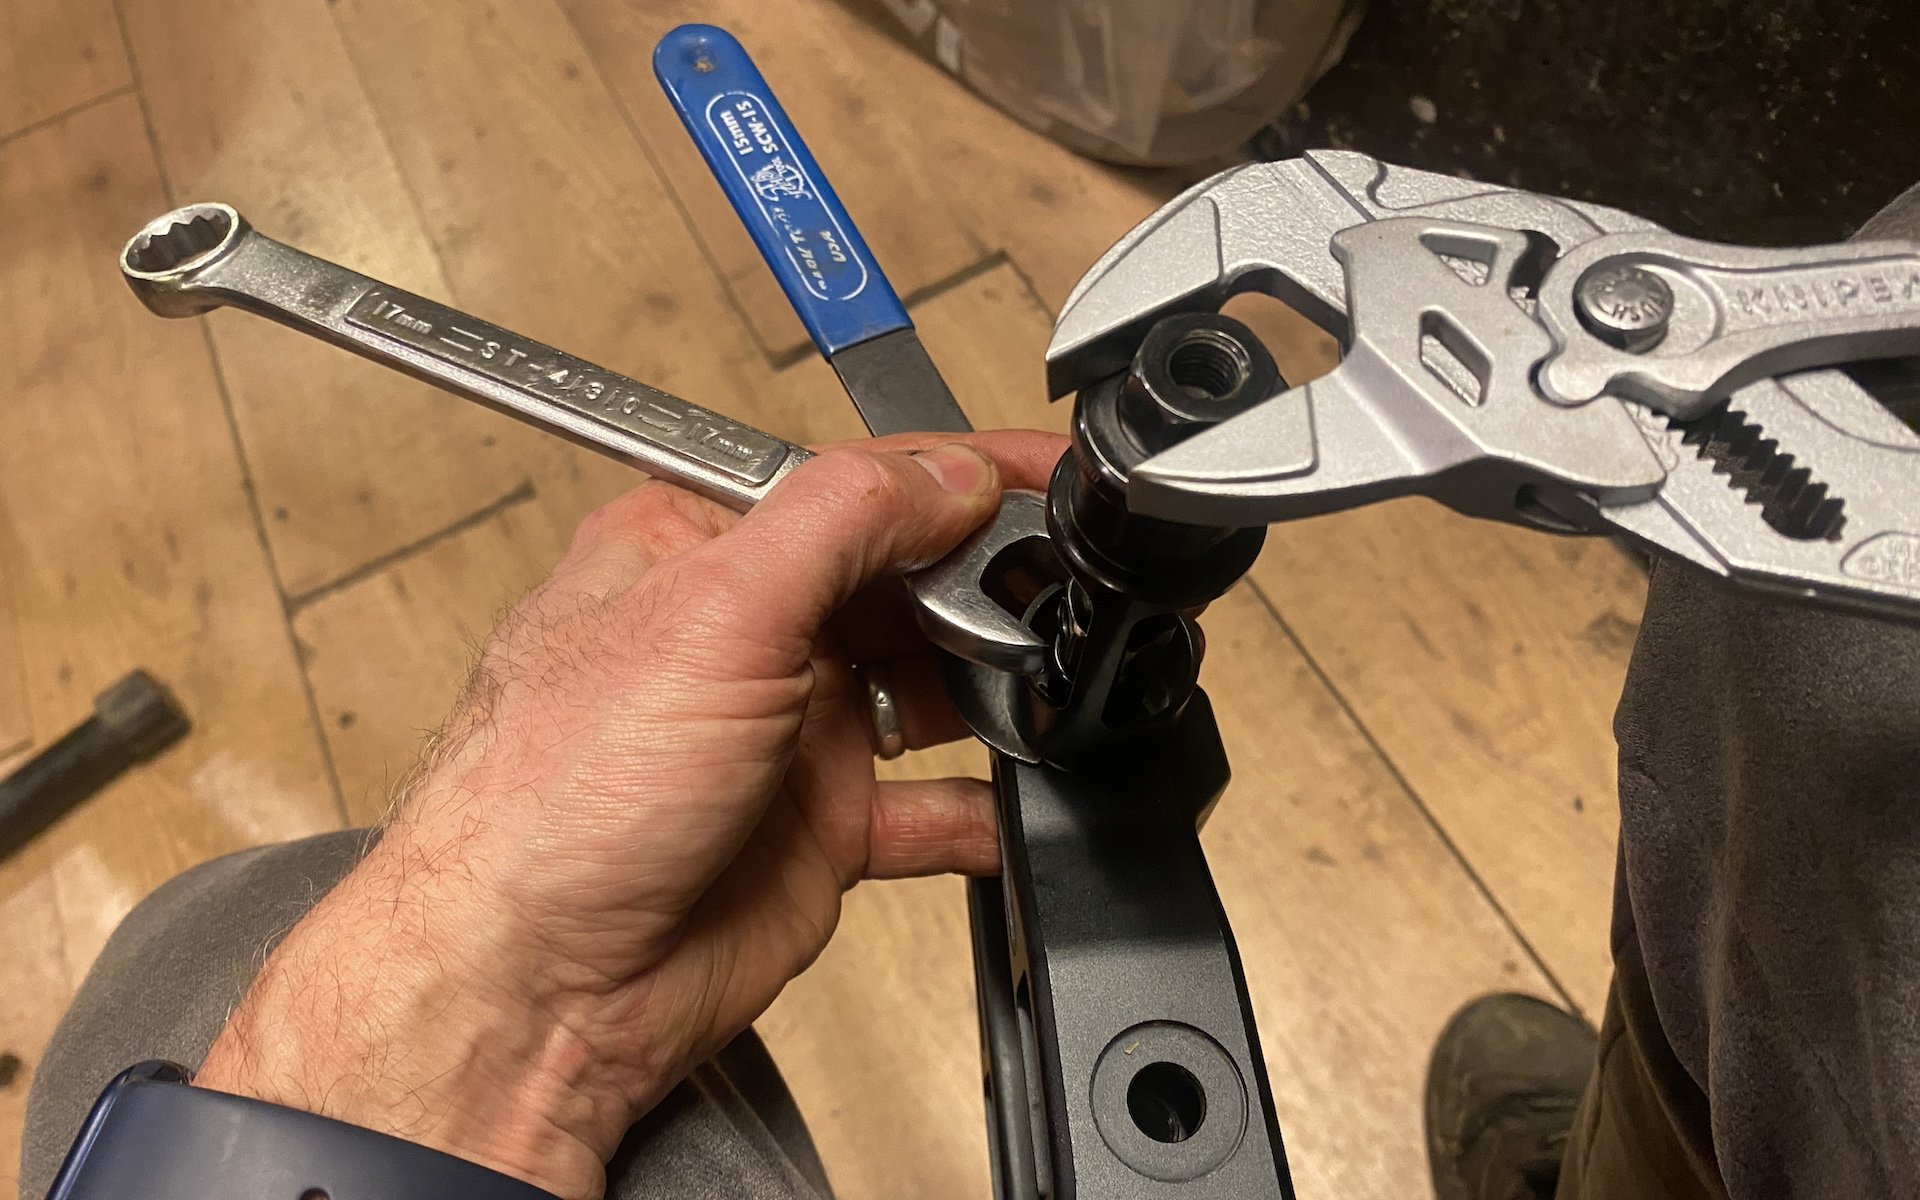
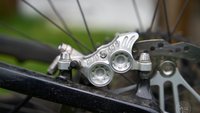
By this point I had some things going on, including an excuse to break out my Knipex Pliers Wrench.
This set was also in the seat stay but at the top, where it attached to the rocker link. These ones went in from each side and there was a lip that separated them, so there was no getting them out without a blind drift. I actually have three of those but not one in the correct size, at least not without modification.

The main axle shaft is comprised of a two-piece bolt. It came out still glistening in grease. Unfortunately, it didn't go back in quite as well as it came out.
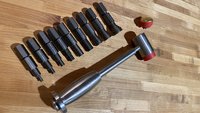
The drift works by driving a shaft down the middle of a collet which is split into four segments. When the shaft progresses further down the collet, the four segments splay outward like a blooming tulip. The expanded lip can then fill an inner bearing race and grab it from behind, even in the case of paired bearings. My kit has a 10mm, 8mm and 15mm blind drifts but I needed a 12. I reasoned that the 10mm version could work if the shaft was a little longer. I rubbed my chin a little, thinking the idea was futile and then had a glimmer of hope. Like Ferrentino, I've got tools as old as mountain biking, going back to the days when the ball bearings in hubs, bottom brackets and headsets weren't even caged. I thought the odds were good I'd find some loose balls in my old kit. If I happened to have one the right size, maybe 1/4", It might extend the shaft enough for my 10mm drift to blossom into a 12.
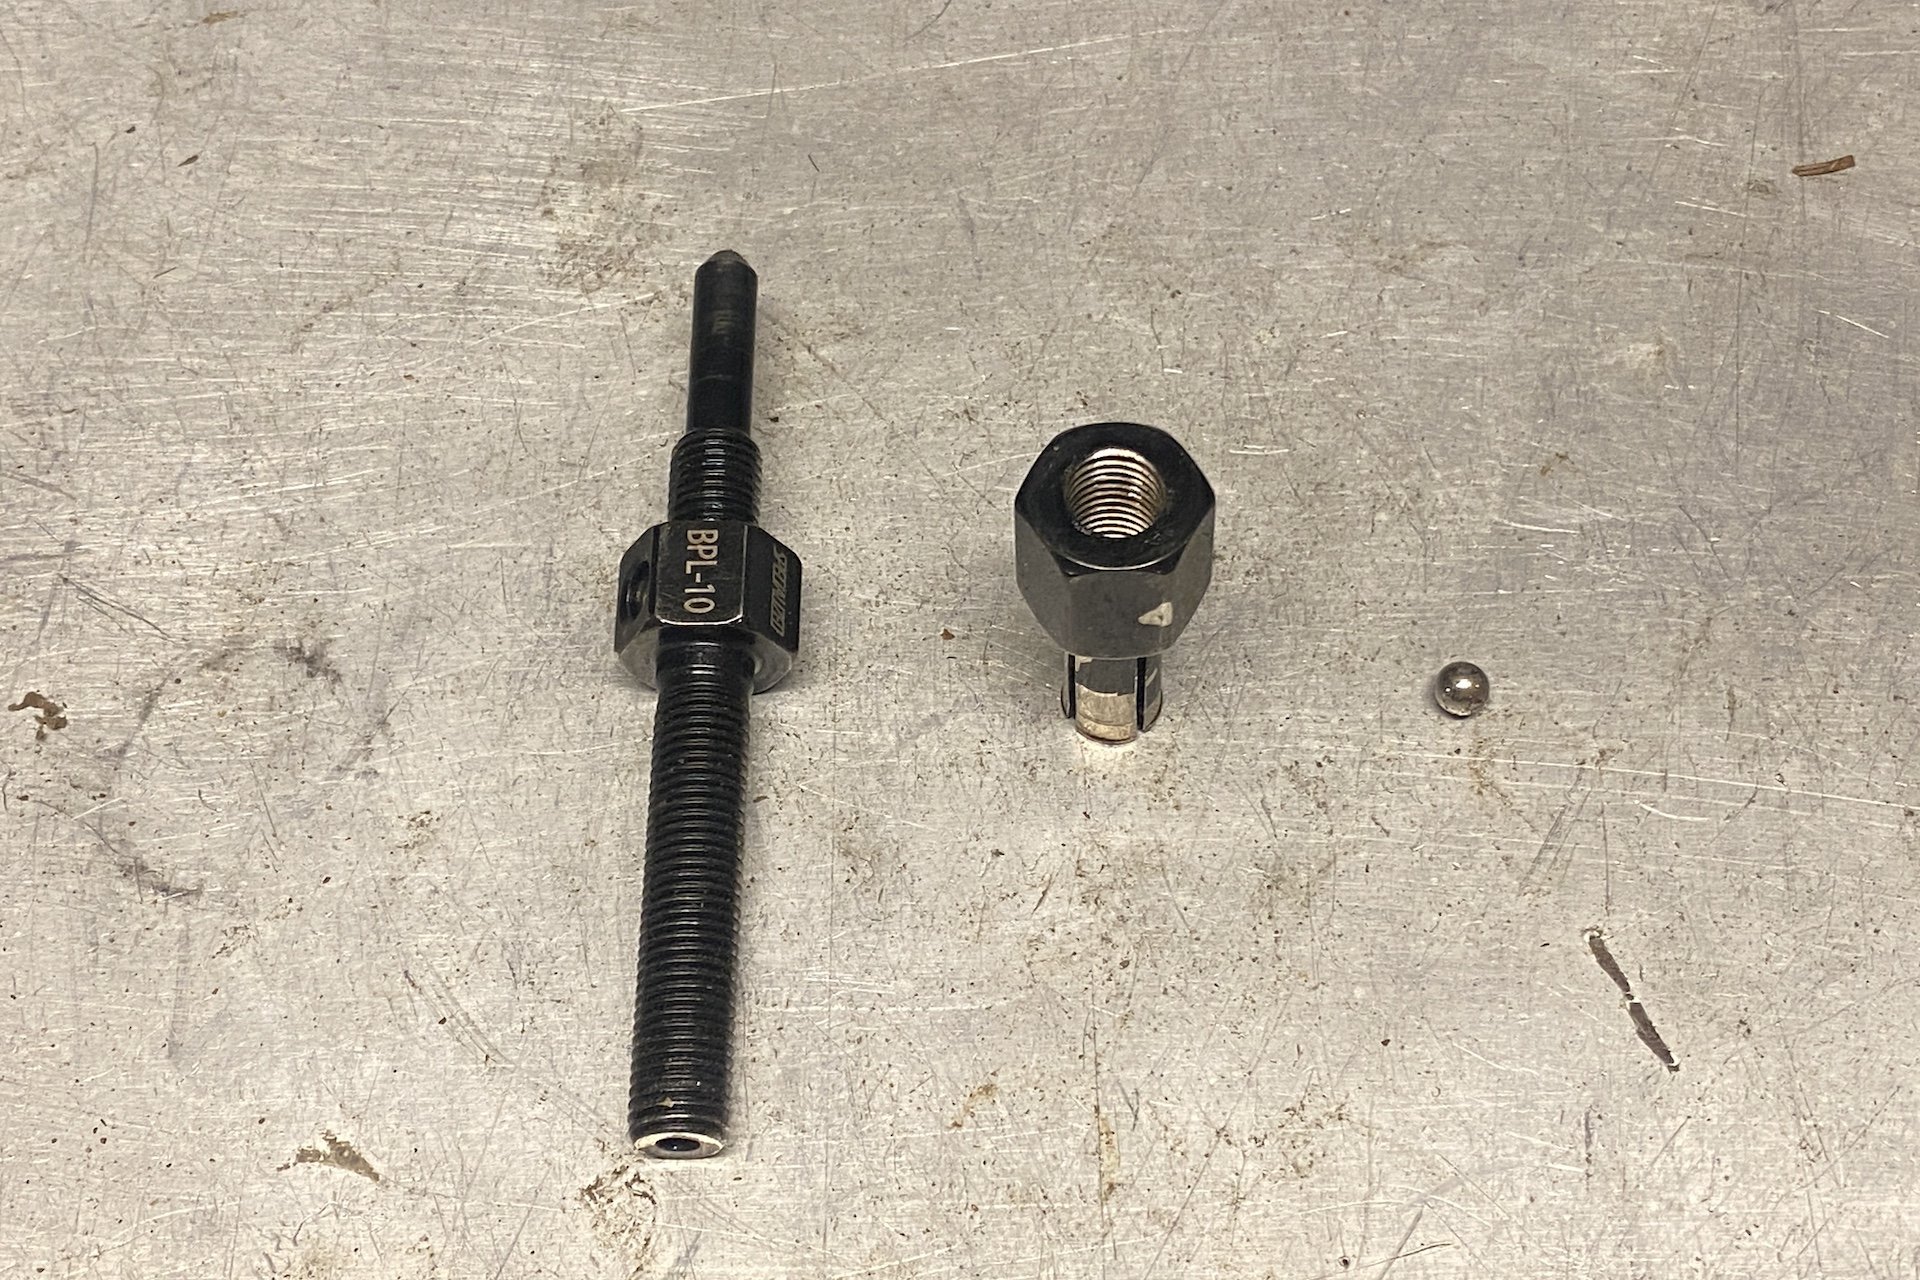
That tiny ball bearing turned out to be incredibly useful.
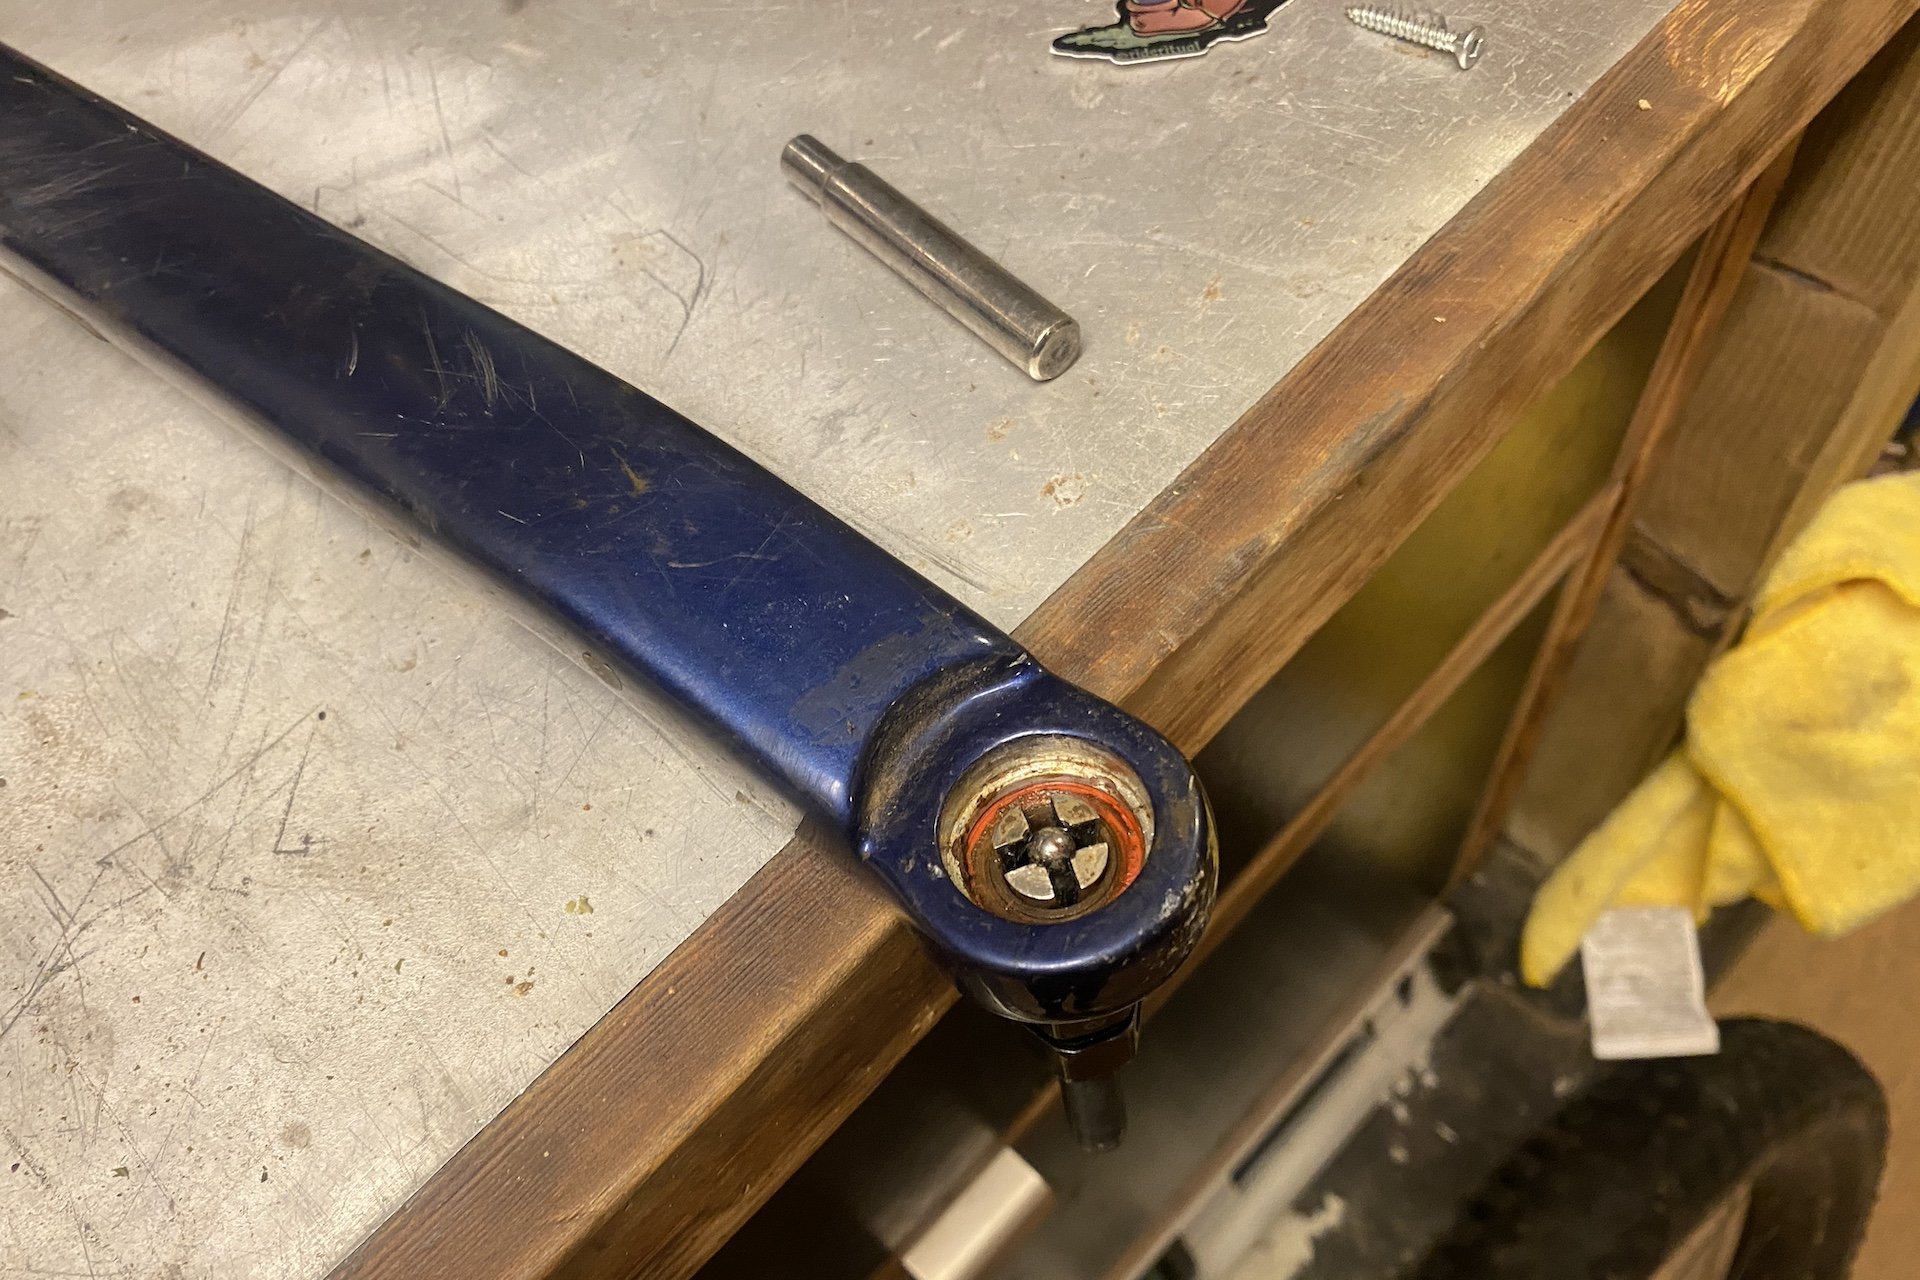
Tadaaaa! The modified tool worked perfectly.
Without too much digging I found one single bearing that looked about right. I pulled apart the tool, dropped the ball in and, at first at least, it seemed to do the trick. I got everything set up and expanded the drift in place and, unbelieveably, it grabbed. This isn't as simple as just yanking it out though. I needed something to protect the carbon fibre from the edges of the sleeve for the initial pull so, again taking a cue from Señor Ferrentino, I slid a 15mm Park cone wrench between the sleeve and the frame so I could give it a good yank. Once it broke free of the the seat, I needed to take everything apart and remove the cone wrench so the bearing could push all the way out. This was time consuming but effective.
Lately I've been getting immense satisfaction out of fixing and building things, both poorly, but nothing makes me feel as chuffed as either modifying or building a tool to complete a task. This felt monumental.
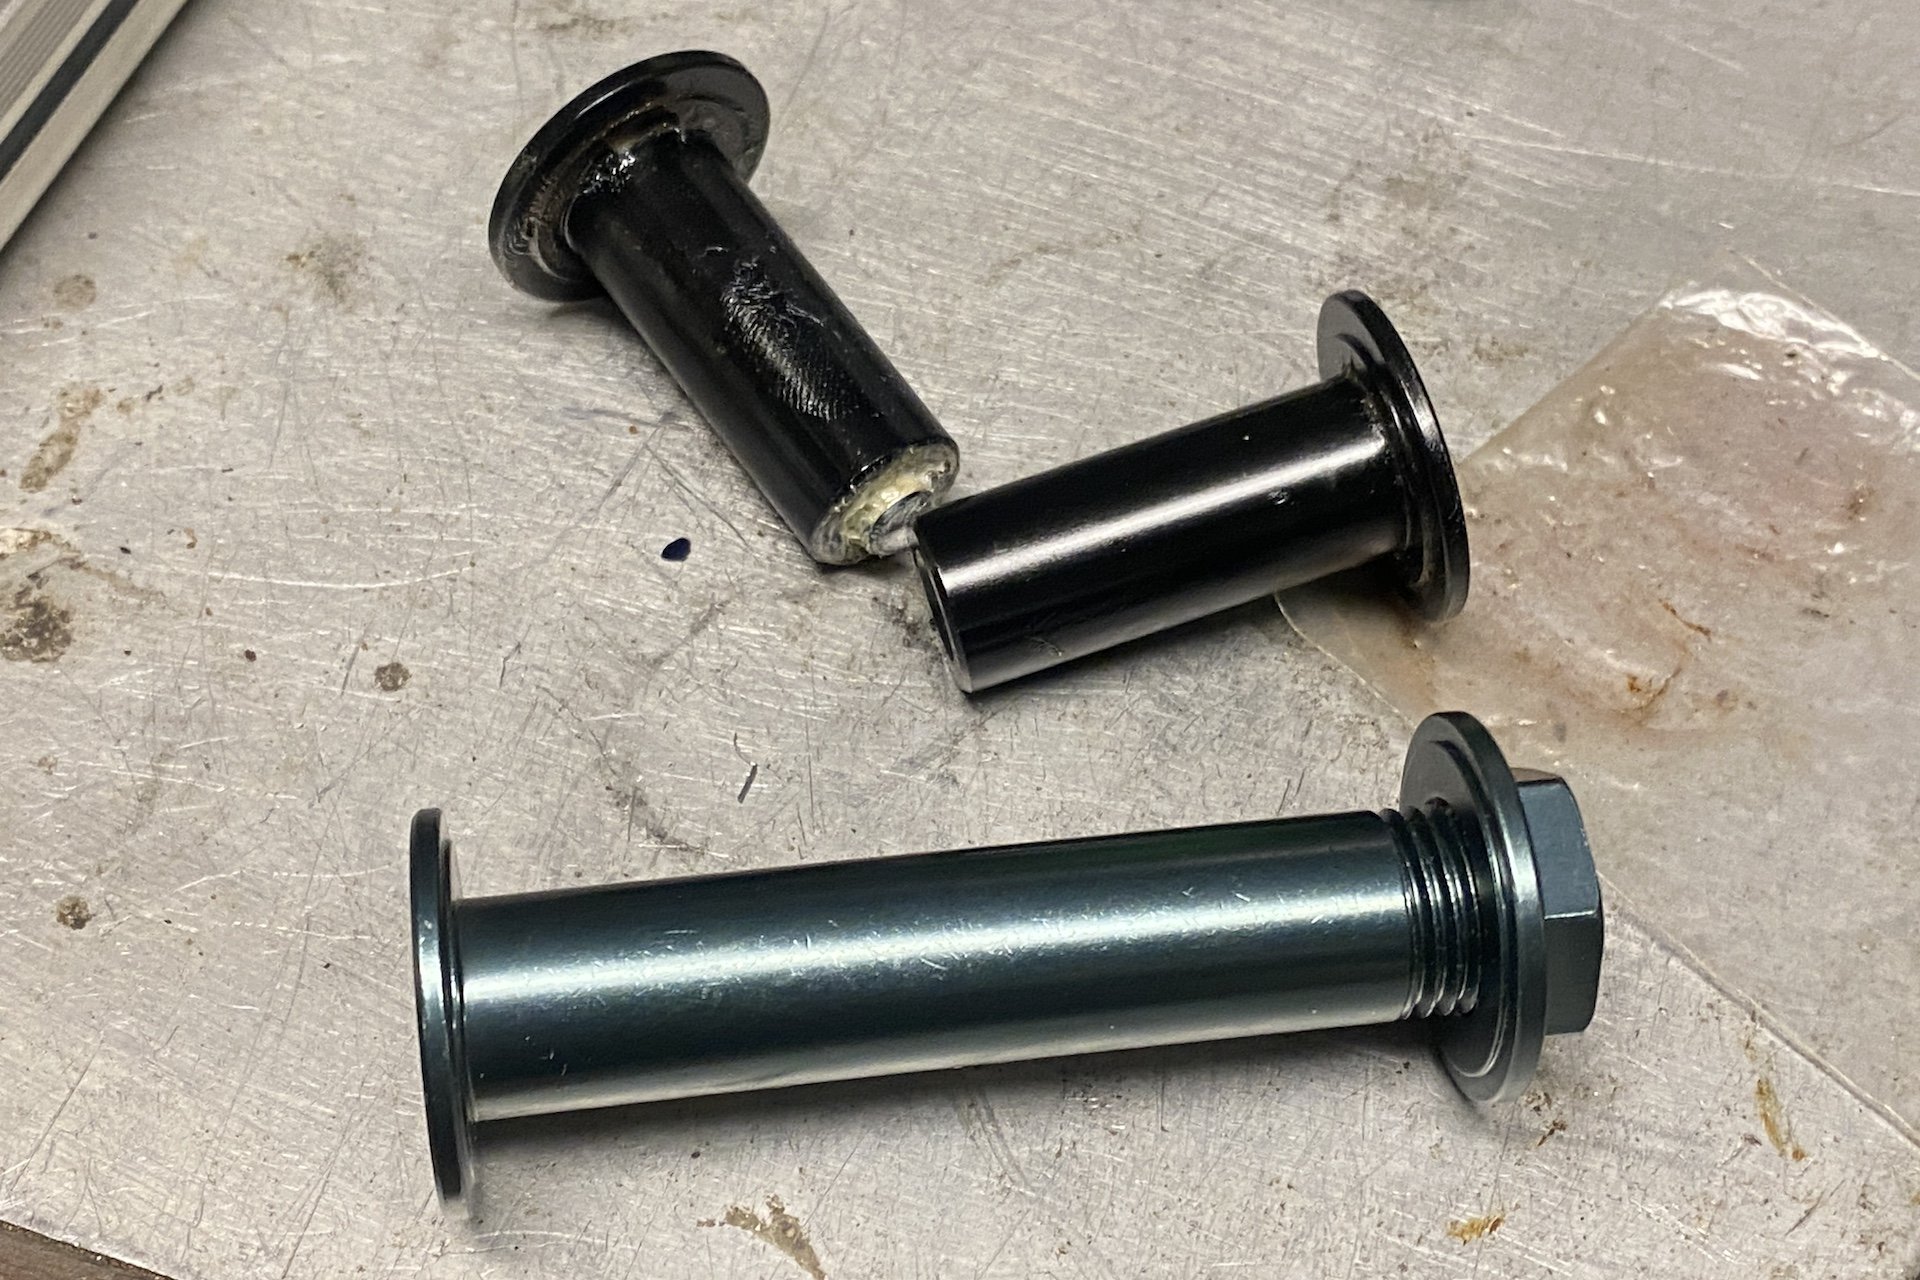
I over-tightened two parts that bolt together to become the main axle. I don't think that's actually settled, but I failed to use my torque wrench so my intended 12n/m may have actually been 14. Or 18. I returned from our local Norco Store with the pewter annodized part seen above. It had me thinking Norco had, recognizing a failure rate, upgraded the part and sent it out to their shops. Instead, it turns out Norco has two Slight VLT carbon exploded diagrams. One is identified as for the 2022 model and the other says nothing, which is the one I consulted - and it was wrong. So back to the shop I went. Once I got the right part and used the torque wrench, it went together like a charm.
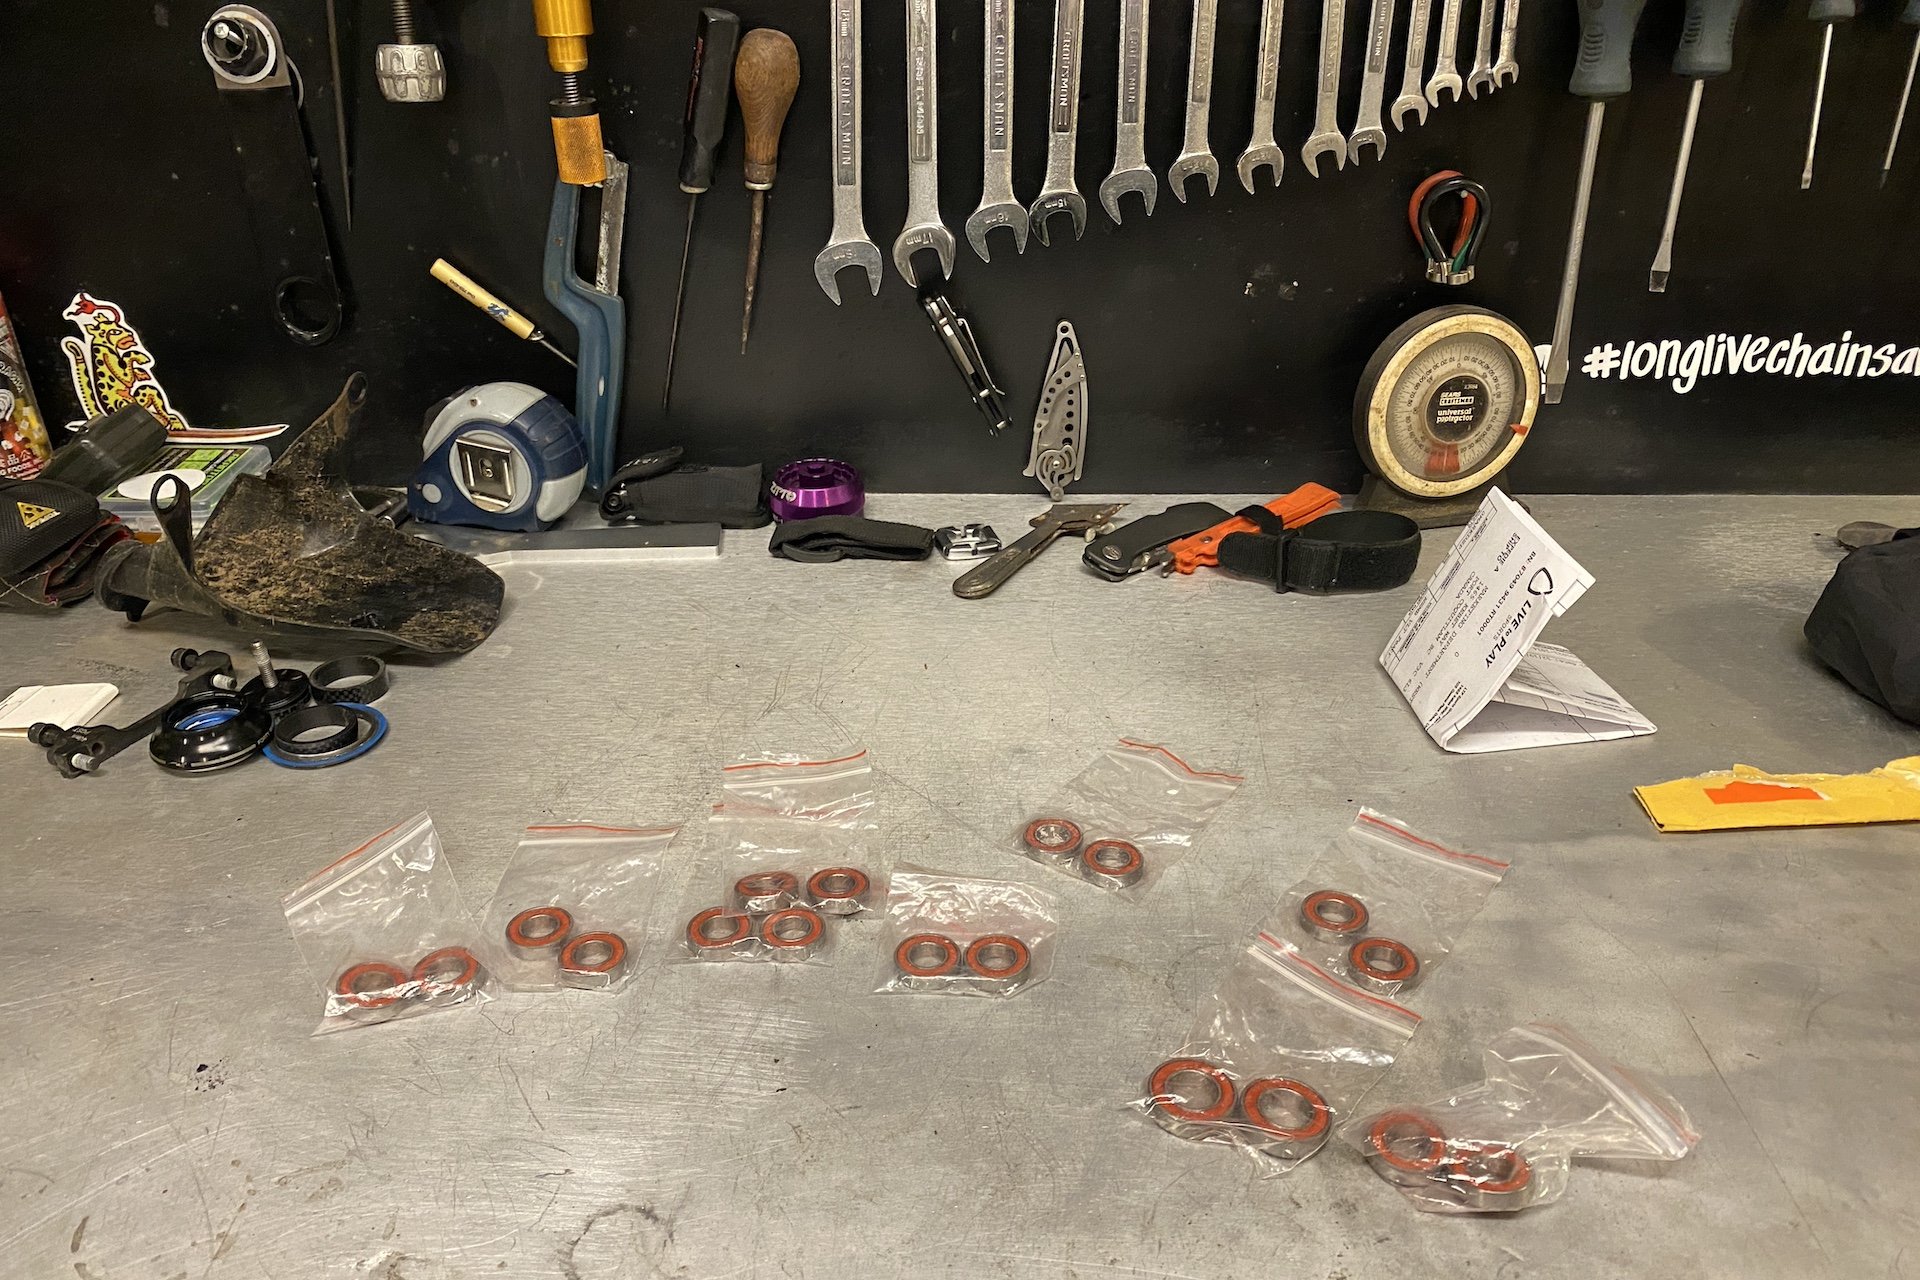
There were many more bearings to go however so it was time to get back at it. Now that I had my blind drift procedure settled I was mostly dialed in. I came across a few bearings that were still perfect (quite shocking all things considered) and I left them in place. The main bearings, the only spot on the bike, with larger 6901 bearings and without doubled bearings, were a snap. I have now swapped almost all of the bearings and I'm just about ready to put things back together.
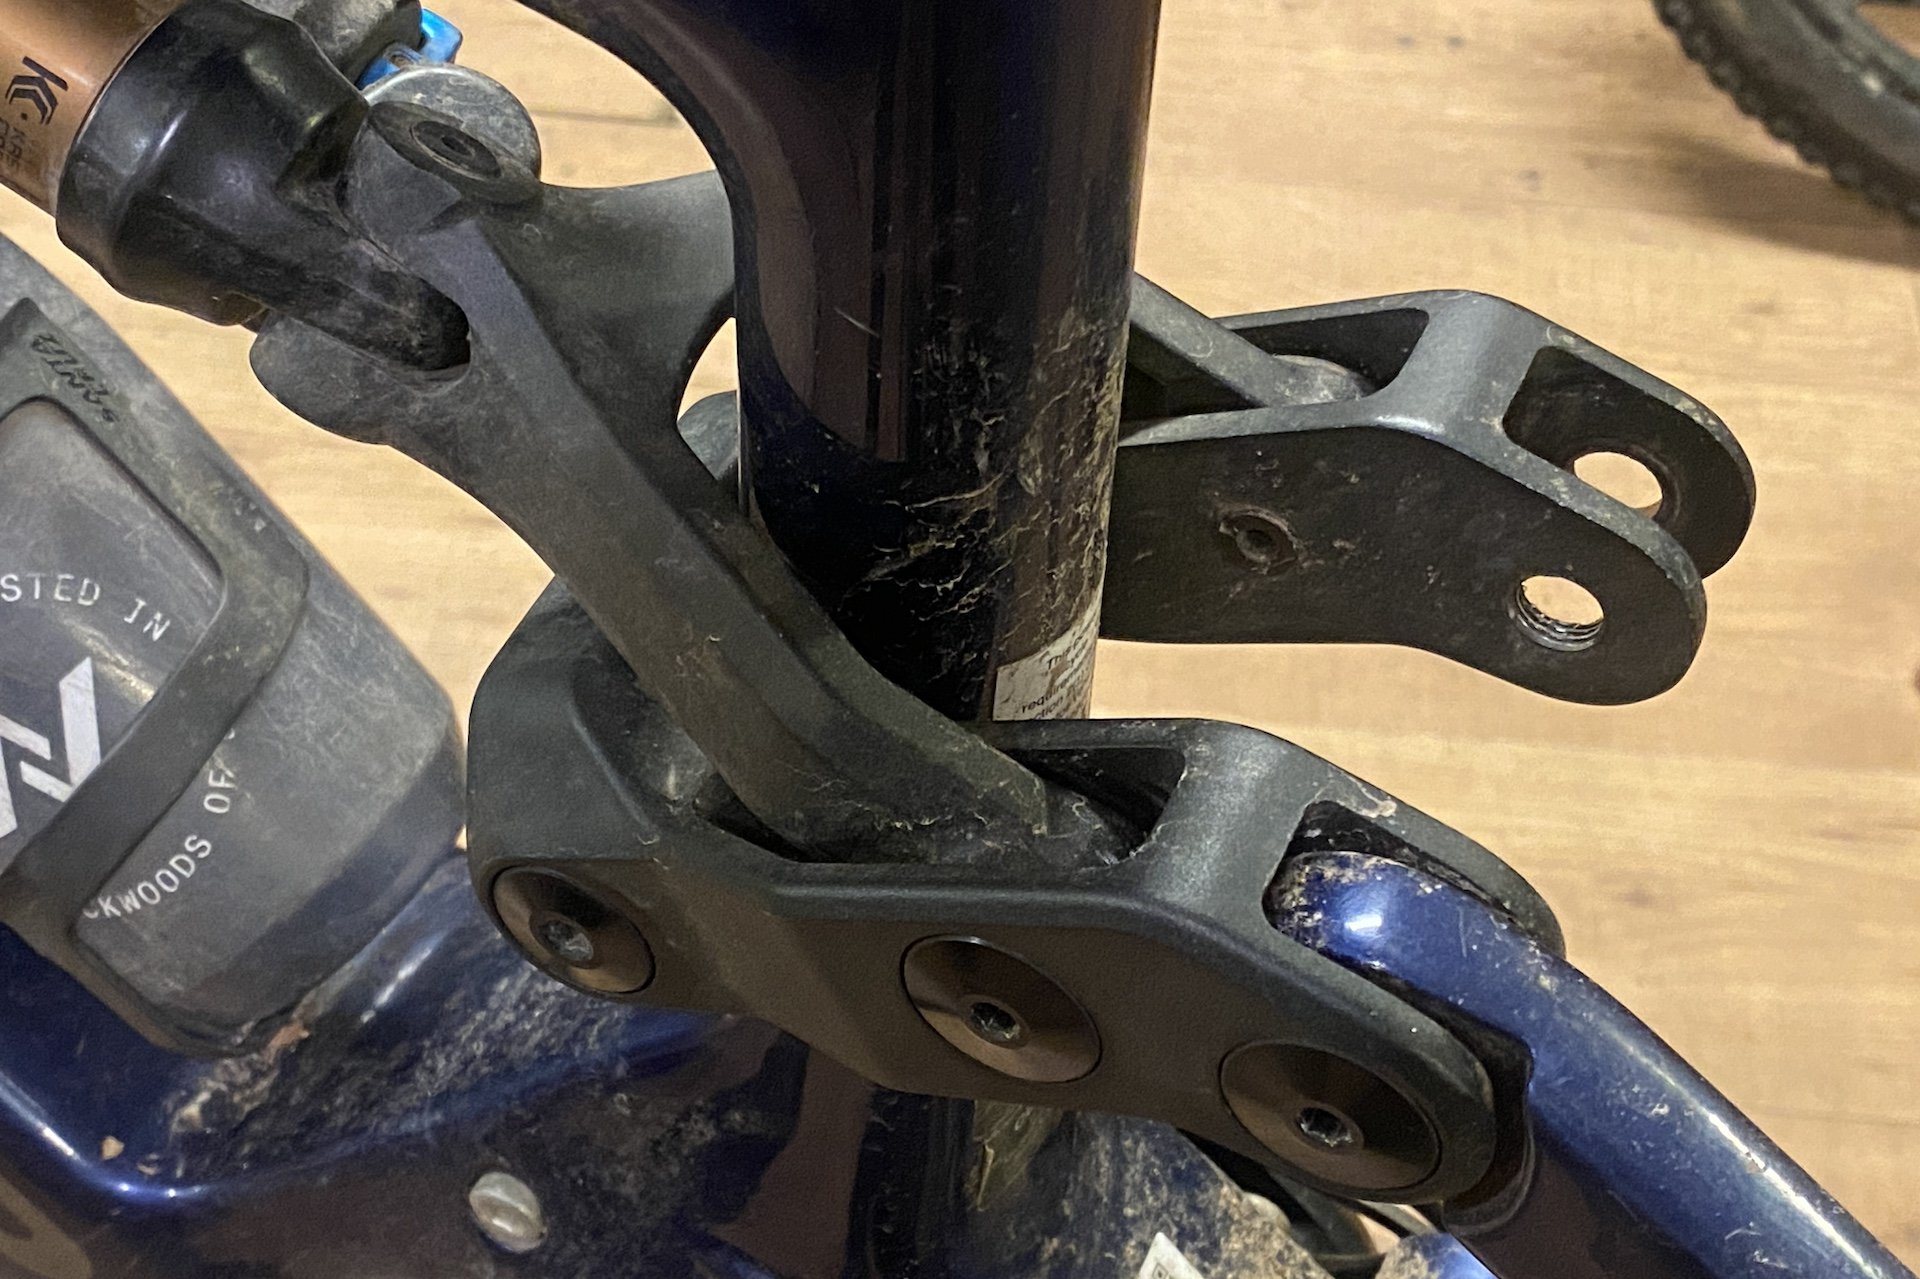
And I found the problem it seems. I discovered that the bearing seat at the non drive Horst Link is too large and those bearings just fell out. As a result, the stay moves independently in certain circumstances, while the bearings stay where they are. I'll need a new seat stay but I'll probably check with Norco and cement a couple in there with JB Weld until the replacement arrives. Now I've just got to put it all back together.
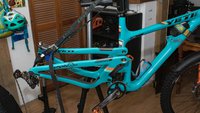
It doesn't exactly look almost done, but it's almost done.
This was a significant challenge for my ADHD-challenged brain but having accomplished it (mostly) successfully feels pretty okay. It also makes the prospect of taking on another daunting task much more palatable.
I learned a lot about the bike as well. The bearings had remained in remarkably good shape after three hard years of riding and the tolerances, with the exception of the one seat at the non-drive side Horst Link, were excellent. I'm also impressed with Norco's effort to double up all the bearings and this has seemed extend their life significantly. The choice of Enduro Max bearings also seems to be making a big difference too. A full set from Enduro will set you back around 129 USD - but couldn't find the exact kit, either on Enduro's site or from Norco. I did find a pretty interesting looking blind drift kit off Amazon for 48 CAD as well and this tool from Bearing Pro Tools looks pretty cool as well.
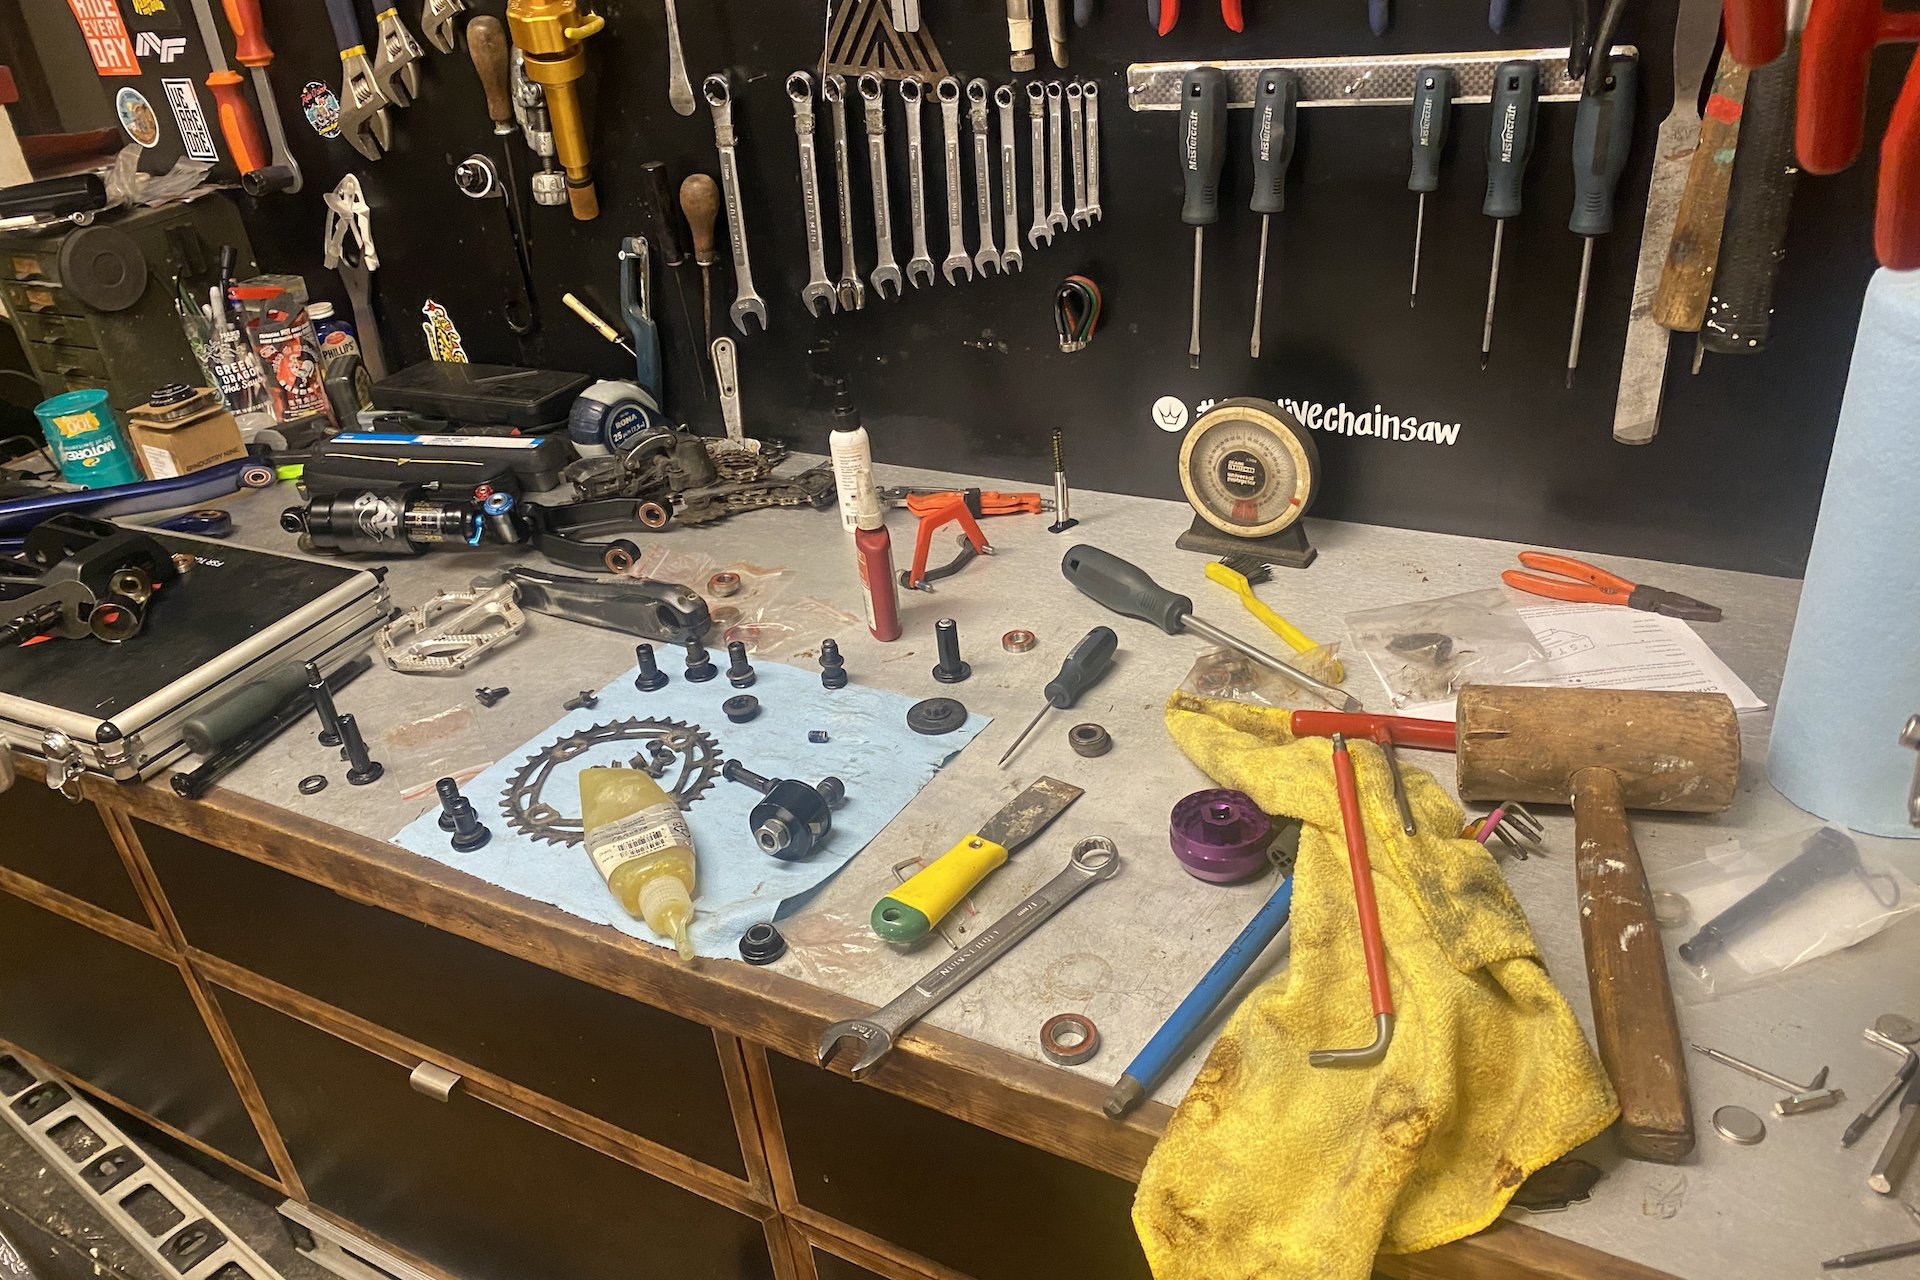
I took a couple of breaks today and put every tool away. It helps clear my head for a restart.
How Not To
In case this isn't clear, my DIY articles aren't meant to be how-tos per se. My hope is that my bungling through some task will help you avoid the mistakes I make and inspire you to try something you think is above your pay grade.
The next thing you know, you'll be giving yourself a raise.


Comments
JT
3 months, 1 week ago
In the social media age where everything is beautiful and perfectly executed the first time it is refreshing as all get out to see another person post their errors. A pal of mine commented to me privately when I first started teaching myself how to TIG weld, that I shouldn't show the ugly learning curves of having a bad teacher and an even worse student, with blown holes and welds without any penetration. I disagreed because failing is part of the learning process and gives better context to the successes commonly shown. If it helps give inspiration to someone else to try something new without worrying about messing up, even better. The 'fail often' mantra drives better understanding and quicker learning. Learning what not to do brings learning what to do a helluvalot quicker than most would think.
Reply
Cam McRae
3 months ago
Thanks JT. That's what I've been shooting for so it's nice to hear I'm hitting it occasionally. And it's so much easier to simply tell the truth instead of pretending you are an expert, which seems quite common on the intrawebz.
Reply
fartymarty
3 months, 1 week ago
Cam - If it's any concellation the bearings in my Murmur came out in about 2 minutes once I got the rear end off.
PS this article bought back memories of getting bearings out of a stainless Hope free hub. It was brutal - at least for the bearings.
Reply
MTBrent
3 months, 1 week ago
I going to go give my Orange yet another hug.
Reply
Lu Kz
3 months, 1 week ago
I always felt like I was doing something wrong whenever I had to pull bearings out of a really tight hub. I did not feel like a professional bicycle technician on those days, but sometimes there just ain't no other way.
Reply
Cam McRae
3 months ago
Awesome Marty!
Reply
Koelschejung
3 months, 1 week ago
18 pivot bearings? I know why I ride a single pivot ;-)
Reply
fartymarty
3 months, 1 week ago
Me too.
Reply
albert03
3 months, 1 week ago
Love my hardtail bikes more every day.
Reply
chacou
3 months, 1 week ago
Yeah that's what I thought, only horst link here. GG has 6 pivot bearings, which is just enough.
Reply
Hugo Williamson
3 months, 1 week ago
As my old boss used to say “ there is no merit in complexity!!”
Reply
Kenneth Perras
3 months, 1 week ago
Right tools for the job....
Blind Bearing puller
A great bearing install kit
That being said, two bearings in a row is a silly design. I feel like the bike industry learned that mistake a couple decades ago. I still have PTSD servicing RMX and early Flatline main pivots.
Reply
Pete Roggeman
3 months, 1 week ago
Have you used that bearing install kit, Ken? That's a good price if it works as advertised.
Reply
JT
3 months, 1 week ago
I have it and combined with the over axle drifts from Wheel's Mfg it's worked a peach on every job it's been pulled into service.
Reply
Pete Roggeman
3 months, 1 week ago
Thanks, JT, good to know. It's something I need to add to the kit one of these days.
Reply
Kenneth Perras
3 months ago
Yep! One of the guys at the shop bought it and it's really well put together. We have alu stock, we have a lathe, we can make our own kit...but that price is a no-brainer.
Reply
Perry Schebel
3 months, 1 week ago
while i'm currently in the caveman camp (hammer / sockets / block of wood), at that price, may be time to up my game.
Reply
Coiler
3 months, 1 week ago
I bought that blind bearing puller off amazon and it broke literally the first time I tried to use it and had to return it. Borrowed my buddies Enduro blind bearing puller and it worked like an absolute charm. Unfortunately its about $600 vs the <$100 amazon one. My advice is find a buddy with the good one like I did!
Reply
trumpstinyhands
3 months ago
That cheap press combined with the RRP handles and threaded bar is a pretty good combo. The stock handle / bar is too flexy and poor tolerances to press in two bearings in at once in my experience. The blind puller is also too light and poorly made to compare to better shop level ones but you get what you pay for.
Either way, a heat gun is your friend.
Reply
Cam McRae
3 months ago
That takes all the fun out of it!
Reply
Onawalk
3 months ago
And for the love of baby jesus, and everything holy, put those stupid Knipex pliers away. You definitly have a box end wrench of the correct size to do the job.
Knipex pliers, for a travelling mechanic, or service tradie, but in your home shop....absolute shenanigans
Reply
Mike Ferrentino
3 months ago
Finger hovers over the downvote arrow... Who be this scoundrel so uncouth as to besmirch the hallowed Knipex? This must be some cruel jape, some knave's provocation, meant only to raise the ire of refined gentlefolk purely for the sake of callow sport.
Reply
Onawalk
3 months ago
Here we go Mike,
Youre gonna need to work for credit here after your damnation of the dropper lever on the Kona Honzo that was so obviously bent in your review....
Knipex pliers, essentially an over priced, over engineered adjustable tool, that requires the use of two hands to adjust the size, so its cumbersome to adjust size to us as a service tool. its jaws open a piddly amount, so it needs constant adjusting (again using two hands). Its only slightly better than a decent quality adjustable plier, which can be adjusted using one hand. The jaw opening amount is so small, that you essentially need 3 of them as service tools, which negates any weight and size savings....
I make a living using tools, have tens of thousands of dollars in good quality tools, and friggin love tools (hell I have a $500 tool backpack) and I have little to no time for these things. They are the gucci handbag of the tool industry, and i judge everyone who I see with an $85, 6" set of adjustable pliers....
World travelling, sure. Technicians service bag, maybe. In your home shop, hell no!
Reply
Cam McRae
3 months ago
OAW, you are obviously an observant type. The sort who notices details. You may notice that there is a 17mm box end in my left hand in that image. If you zoom in on that photo, you'll be able to see in the indicator window of the Knipex a number. That number is 17.
Alas I do not, at least not in that shop, have two 17mm box ends. I am not generally a frivolous user of tools, a certainly not for show.
I suspect Baby Jebus would approve.
Reply
Onawalk
3 months ago
Then an open end wrench, or a socket, even a good quality adjustable wrench is a better tool!
I get it, your kids love the Knipex pliers. I'll be totally honest, I dont get it outside of a service tool (keeping tool bag weight and size down is important)
But in the shop, Jesus
It only slightly better than flat jawed adjustable pliers (somehow at 3 times the price) and not a substitute for the proper tool.
Reply
Onawalk
3 months ago
What I notice is you have some off-brand combination wrench in possibly the right size, and a pair $100 adjustable pliers. When you could have spent half the money, and had 2 sets of decent wrenches in your home shop.
or a socket and ratchet.
and no vice....man I'm baffled.
You got lured into owning Knipex pliers instead of buying the right tools.
Apologies for being so fired up! As you were, Im gonna go do a lap
Reply
Cam McRae
3 months ago
I have a vice but it wasn't helping me here. And I certainly didn't pay 100 bucks for them. Not even Canadian.
I'm keen to learn though if there was a better tool for that purpose. I find the Knipex works great for removing the top nut on forks without marring the aluminum the way a box end would (and it saves me buying a bunch of non-chamfered sockets) and in the example above I could release my grip and recompose to turn it again without having to lift it off so it was as handy as a ratcheting box end. It also allows you to keep some clamping force on the fastener which is great for hardware that is problematic for whatever reason. I love the range from the smallest nut you are likely to find all the way to 52mm in a tool that weighs maybe 1/3 as much as a huge adjustable that would cover that range, and be all but useless for smaller fasteners.
Sadly, my kids don't give a shit about tools.
Reply
Onawalk
3 months ago
In a service bag, or toolbox that goes to the trailhead, sure, I get it. Its not for me, but different strokes as they say.
I mean a socket and ratchet would have been a great tool for what you were doing, easy to reposition in much smaller increments, can rotate to any desired position for greater leverage, captures the removed bolt, wont/cant slip or round off the corners, wont leave apprentice marks,....
Grind down the chamfer from a $11 dollar socket, and stop wrecking your top caps
Saying you didnt pay that much is akin to PB recommending AXS all the while getting boatloads of it simply handed to them.
Not sure what your idea of "not even close" is, but Atlas MAchinery, Mississauga Hardware, etc are typically cheap on these, and theyre still $80 plus tax.
"tools" have changed in so much that I bet your kids are into computers, etc. Tools were the things that I watched my father fix the world with, so they fascinated me. Your kids likely see you on bikes and computers more, as I bet you do a lot of wrenching after theyve gone to bed.
https://www.atlas-machinery.com/knipex/KNIP-8603250SBA
bishopsmike
3 months ago
It clearly doesn't matter if the Knipex work great for you for tons of tasks, saved the space of an entire 2nd set of wrenches, you personally really like them and you got them at a good price. Someone needs to point out how you're wrong.
Andy Eunson
3 months, 1 week ago
I don’t do frame bearing replacement myself any more. I had a press kit for my Blur and other Santacruz bikes. But then I pushed a bearing out the wrong way because I couldn’t see well enough and the tiny machined lip came off. Never tried or actually needed to replace many bearings after that. I would need to obtain a proper press kit if I was to attempt that work again. A good one isn’t inexpensive. I don’t think I could justify that expenditure. My local shop says that every time you remove and reinstall frame bearings causes the bore to get a little bigger. They figure you can only do that so many times before you have loose bearings. If the rear triangle moves freely and has no play, you’re good to go. I do pull seals a couple times a season to check for rust and play and general function.
I don’t appreciate manufacturers who make things overly complex and difficult to service at home. Oneup seat posts are dead easy to do at home. Reverb last I checked needed special tools or a handful of zip ties and 99 steps. No thanks. I figure if Reverbs were simple to service at home, perhaps those early ones would not have had such an allegedly poor failure rate.
I find it interesting that people seem ok with more complex rear suspension yet complex multi pivot forks never go far. There’s a lot to be said for simpler mechanisms.
Reply
BarryW
3 months, 1 week ago
"My local shop says that every time you remove and reinstall frame bearings causes the bore to get a little bigger. They figure you can only do that so many times before you have loose bearings."
This seems suspect to me just based on how that would be working. It would mean that you are physically removing materials from the bearing location and im trouble believing that actually happens. Maybe your local shop just doesn't like doing bearing swaps ;-)
Reply
bishopsmike
3 months, 1 week ago
Not necessarily removing materials, but just stretching out the alloy carrier material as they struggle to keep the bearing straight while you're pressing them. I've heard the same thing about press-fit bottom brackets and headset cups, that you wouldn't want to be changing them out a dozen times.
Reply
JT
3 months, 1 week ago
If you press in/pull em out at an angle you'll deform the mating surfaces well enough. Things learned as a teen bmxer replacing axles on Peregrine hubs near monthly. Strangely, about the same time I learned to save the dead bearings and use them as the drifts I didn't have. Worked way better than a socket and hammer :D
Reply
Cam McRae
3 months ago
To be clear, while time consuming and challenging, I would agree with but considering how much I have ridden this bike and the condition of most of the bearings, I'd say Norco did a great job with this bike. It certainly isn't complicated for the sake of complication. It's a Horst link essentially and it requires quite a few pivots, but I wouldn't even call it very complicated.
Doubling up the bearing seems to have halved the wear and tear on each, as you'd expect. There is an issue with the one stay and at first I struggled to figure out how to deal with the one set of paired bearings that could only be accessed from one side but that's on me. I'll take that over a bike that requires swaps every 6 months or so. It's not perfect but the bike also rides incredibly well and my goal is to keep it in service for a good long time.
Reply
SebO
3 months, 1 week ago
That's why you put the bearings inside the links, not the frame...!!!! Good job sorting it through though. I would've thrown the frame into a pile of discarded Christmas trees way before.
Reply
Kenny
3 months, 1 week ago
Agreed but it's only possible with certain linkage designs.
Not possible on Horst/single pivot/linkage driven single pivot.
When I get into a bike project and realize I don't have a tool I need, I've gotten much better at pressing pause and procuring the right tools before proceeding, and resisting the urge to bodge things.
Good quality tools are generally a buy-it-for-life scenario. The term "buy once, cry once" also typically applies.
Frames are what, 3000-5000 bucks these days?
If you plan on doing pivot bearings on your rides, bite the bullet and buy a master metric blind puller set from wheels manufacturing or Enduro. Put it in your toolbox. Your kids will use it after you, or pawn it for drugs.
Reply
DancingWithMyself
3 months ago
They should definitely be in the links if possible, but if as Kenny says, sometimes that's not possible. However, it should absolutely be easy to work on linkage that it seems to have been on this bike. If forced to choose, I think I might choose a frame with headset cable routing over one with a linkage and bearing design as difficult as this bike's seems to be.
But I disagree somewhat with Kenny on the bearing tools, and I'll cast another vote for the bearing pro tools stuff being solid. Just because it's not top-of-line doesn't mean it doesn't work perfectly well or even just as good as the shop-quality stuff. A lot of the cost of "shop quality" is the tool still performing well thousands of uses into its lifespan. For example, on the first use I doubt the Abbey chain breaker actually breaks your chain in a meaningfully better way than a much, much less expensive tool. But, assuming there is a point beyond the fancy green finish, that ain't it.
A bearing press/removal kit for home use is probably neck-and-neck with headset and crown race tools as examples of things home mechanics will use fairly infrequently. I wouldn't buy crap, but I'm not sure I see the point of buying the best-of-the-best in this particular tool category, especially if you know what you're doing and have the self control to stop if something isn't working.
More generally, I absolutely subscribe to buy once, cry once. I've got a chest of mostly very high quality everyday tools, a nice selection of pro bearing tools, and buddies at shops for headsets and crown races.
Reply
Kenny
3 months ago
The reviews of that super cheap puller set are mixed at best, see coilers post further up as an example. Probably better than nothing and you could replace any that break with name brand ones I guess..
But, the wheels manufacturing ones are only 40 bucks each bought a-la-carte, if a person doesn't want to buy the set they could just buy the couple sizes their frame needs and expand as they get new frames. 8/10/12 and maybe 14 are really all you need though, pretty rare for linkage bearings bigger than that to be blind.
Also in cams situation rigging the puller to spread more is asking for trouble. Shim the OUTSIDE of the puller with aluminum tape. If you have a 10 and can't buy a 12 in a pinch, you only need to build up a 1mm thick layer to increase the OD 2mm.
The headset press is one item I'd actually contradict myself on.
A decent home mechanic doesn't need one in my opinion unless they're doing lots of tinkering with anglesets or something, for a couple reasons:
1. Excluding people doing lots of angle sets, headset cups get pressed in once, not yearly.
2. Bad headset presses are terrible and require as much focus to keep things straight as the "block of wood and a hammer" method.
All of my comments also assume you own a half decent bench mounted vise. 100% required for this type of work.
Reply
bishopsmike
3 months, 1 week ago
I've had great luck with my purchases from Bearing Pro Tools too. Nice tools just makes crappy chores better!
Reply
MTB_THETOWN
3 months ago
The extractor is okay but their press was absolutely garbage. The one I got the main rod bent the first time I used it and the threads also bit into the soft aluminum of the drifts. I've now invested a small fortune in tools for inserting and removing bearings to avoid that frustration of that kit from bearing pro tools. It was a lesson for me against buying cheap tools
Reply
Mark
3 months, 1 week ago
"...the odds were good I'd find some loose balls in my old kit"
I'd say that's a given.
Reply
Andeh
3 months, 1 week ago
Someone on TGR linked this page as a good discussion on the various ways to remove/install bearings, and the pros/cons of each: https://escapecollective.com/threaded-6-obsessed-with-smoothly-removing-cartridge-bearings/
It's not that bad with good tools, just time consuming. I've got the Alt-Alt kit in that link, and a handful of blind pullers. When I had a GG, there was no shielding of the bearings so they died every few months, and I got LOTS of experience at replacing them. Good riddance to that bike.
Reply
Brother Lu
3 months, 1 week ago
Cam, did you remove the swing arm or just let it hang there? I have the same VLT and was going to inspect the 2 swing arm bearings this weekend. Just not to excited about cutting brake hose, removing derailleur housing, speed sensor :). I have the specific Bearing Pro Tools for this frame, and they work great.
Reply
Cam McRae
3 months ago
I just left it hanging for the reasons you mention but I have an AXS rear derailleur (for that reason). It worked fine with only the wire and brake line and pulling the derailleur housing would be quick and easy if necessary.
Reply
Rick M
3 months ago
IDK how double stacked bearings are better (or worse) than a single double-row bearing. Pressing bearings out of a carbon swingarm can be a tedious and nerve-racking process. The inner race of this double row cartridge bearing failure has only occurred once in the three years I've had this Alchemy Arktos 27.5. In fact, since I replaced them following this failure I have not had to replace (while all other pivot bearings have been replaced 6 times).
I can appreciate home-grown bearing pull/press methods. I use a variety of tools and hardware to make it work.
Reply
Please log in to leave a comment.